
Navigation: – Lead box ->Leads -> More-> Import CSV
You will be re-directed to a File upload page as shown in the image below.
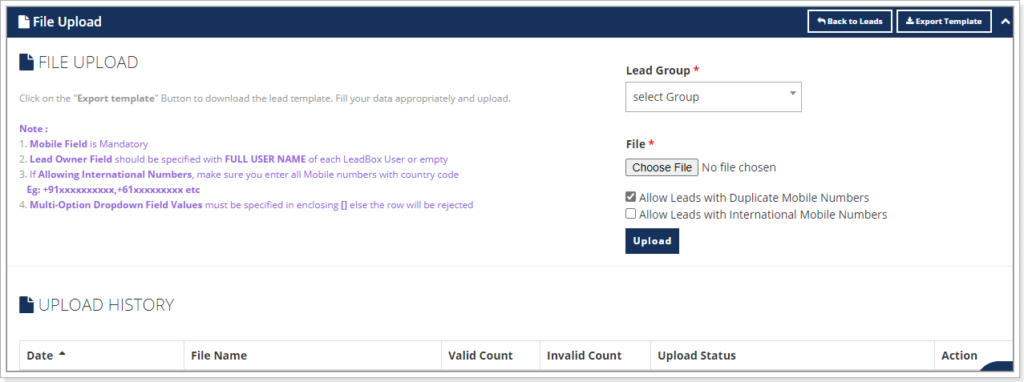
Follow the steps for Import CSV –
Step 1 – Export template
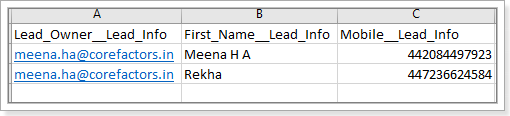
The leadbox custom template in CSV format is downloaded in your local drive. The excel file headers are shown in the below image.

Step 2 – Fill up the Excel File
Open the Excel file and fill in the following information to have a successful Import of data.
- Lead Owner – Mention the agents email id in this column. The Email id should be the same as the Full Username or Empty.
- First Name – Mention your Lead’s Name for easy identification.
- Mobile Number – If Allowing International Numbers, make sure you enter all Mobile numbers with country code.
- Eg: +91xxxxxxxxxx,+61xxxxxxxxx etc.
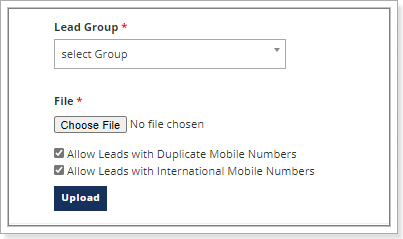
Step 3 – Save and Choose
Save the Excel file and click on teleduce and choose the below information –
- Lead Group – You have any specific groups created for the leads to be filled. You are allowed to choose the group. If no group is configured, select Default.
- Choose the File – Choose the file you have filled the information.
- Duplicate Numbers – If you wish to allow duplicate Mobile numbers as a lead in the Lead Box, you can select checkbox the option.
- International Numbers – You should select on the Allow Leads with International Mobile Numbers, when your files consists of International Numbers.
- Multi-Option Dropdown Field Values must be specified in enclosing [], in the excel file in the particular column. Else the row will be rejected.
- Ex: [Facebook][Indiamart]
Step 4 – Upload
After all the options are selected, Click on Upload. Once the file is uploaded, you will be able to see the File details in the Upload History.

- Date – The date and time the file was uploaded.
- File Name – The File name you had saved before uploading.
- Valid Count – The Excel file uploads the leads information which has successfully passed all the conditions.
- Invalid Count – If there is an error in the Lead details, the system go throughs all the columns and checks the conditions and provides you the Invalid count.
- Upload Status – Irrespective of the File has errors or not. It shows the Success Status as it sees all the conditions and tries to upload it. It means, the File was successfully fetched by the System.
- Action – You can see that the Action here has a download upload, this allows you to download the excel file of Invalid leads and provides you the error reason in the last column of the Excel File.